Friday, April 1, 2011

Kitchen Rehab

I love beautiful kitchens.

What really calls to me is kitchens where the island looks like a piece of furniture.

Like these beauties:
(No idea where this came from - I've had it saved for a little while)

As I'm posting these pictures I noticed that both pictures feature black islands.  That wasn't even on my radar when I saved these but it IS what I'm doing with my kitchen.  Apparently black calls to me as well.

This is my current kitchen:

Lower Cabinets
I was so tempted to add arrows & labels to everything I want to change but I figured you wouldn't be able to see the picture anymore ;)

Everything except the layout is changing.  The cabinets are getting painted, the hardware updated, the blue sink (while definitely a conversation piece) is getting replaced, the hundreds of switches are being streamlined (hopefully), backsplash updated, counters replaced... whew.  I think that's it for what you can see in this picture.

Upper Cabinets
These upper cabinets provide a ton of storage but they also prevent anyone in the kitchen from being able to see what's going on anywhere else in this part of the house.  The ceiling is a drop ceiling so the cabinets are just that much lower.  I'm thinking open shelving.  I know it scares a lot of people but I think we can pull it off.

Here is the view from the dining room.


I am so excited to dig into this project!!

Wednesday, March 30, 2011

Time to get it done

I feel bad.
My son's room is perfect, my favorite room in the house by far.  But he was my first and I had a TON of free time to decorate his room before his arrival.

My daughter joined our little family nearly two years later and I just couldn't get her room done.  I had a hard time coming up with a plan, I couldn't find time, and I just couldn't envision it.  Here it is nearly 3 years later and it's still not complete!

I'm working on fixing that right now!  Maybe by her 3rd birthday I'll be done.  Maybe.

First she needed something on the walls.  This is what I wanted:

This is what I did first though:

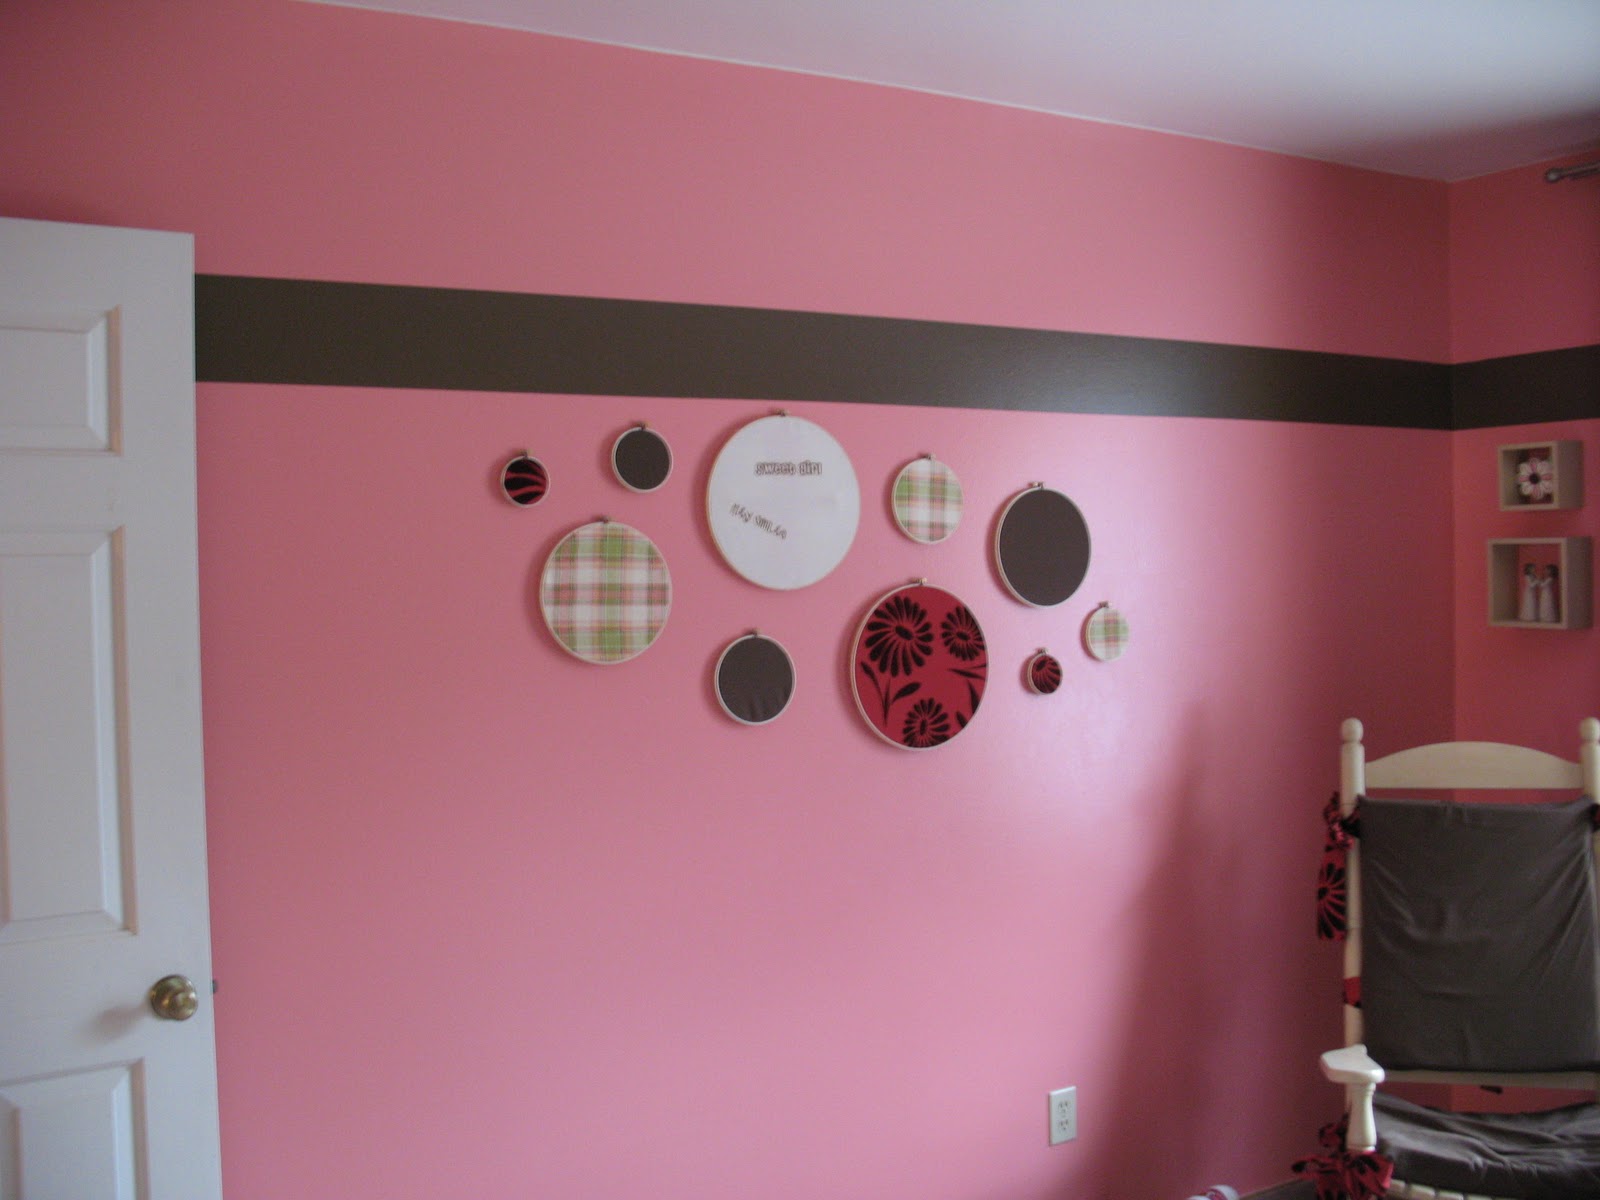
I got impatient one night and used some blank canvases I had around the house instead of going to get some embroidery hoops. I hated it!  As soon as it was on the wall I hated it!  I never even tried to find something else for the 2nd little shelf.  The next day I went on a hunt for embroidery hoops.

I used iron transfers to add a couple of Elsha's most common nicknames to the center hoop.  I'll be adding more names to it as she aquires more nicknames and pet names.


Every week the circles seem to be in a different pattern.  Sometimes a little different, sometimes a lot different.  I learned that the kids were taking them down and playing with them.  I can envision embroidery hoop frisbee's flying around the room.  As long as they put them back...

I'm really liking the plaid material. It has this line of green in it that I think the room really needs.  I'll be using a lot more green in her room in future projects.

Monday, March 28, 2011

Beautiful Pantry Doors

I had this wall of closets in my kitchen

I loved the storage they provided but just not the look and feel.

I made a change - a big one - and I love it!


The original plan was to frost the glass but I am liking the way it feels open.  So... I'm adding decorating the pantries to the massive To-Do list.  Funny story about that list actually.  The other day my husband asked me what I was going to do when I got everything done on the house.  I just laughed and said "We'll never be done sweetie, but it's cute that you think we will be."  Isn't it true!  There's always something.


Next time I do a project like this one I'll peel all the plastic off the individual windows prior to painting.  The paint sealed some of the plastic in and it's been a pain to get out.  I've had to go around each pane, front & back, with tweezers and attempt to pull out all the plastic.  Once that's done I'll need to touch up the paint where the plastic pealed off the paint when we removed it.  Removing the plastic is a tedious task now, one I don't know if I'll ever really finish.  It also feels more like cleaning than a fun project so it's on the list but not very high.  I'll do it one day, eventually, when I'm bored (HA!).

There's a sneak peak of my next two projects up there.  I <3 Beadboard!

Friday, March 25, 2011

Finishing up My Vanity - Desk

I can't wait.  I have to share my new desk, turned vanity!


I used this tutorial from Centsational Girl for the paint technique.  I made a few adjustments to make my piece darker. Glidden's Peacock Blue replaced the turquoise.  Black paint left over from another project was used instead of white.  After attaching my applique and hunting down the perfect tutorial I noticed Cent. Girl used the same applique.  Great minds and all...HA, cuz you know I have no where NEAR her skills.  I was just impressed I put mine on in the right direction - whew! 

I love the overall effect and it turned out better than I imagined.
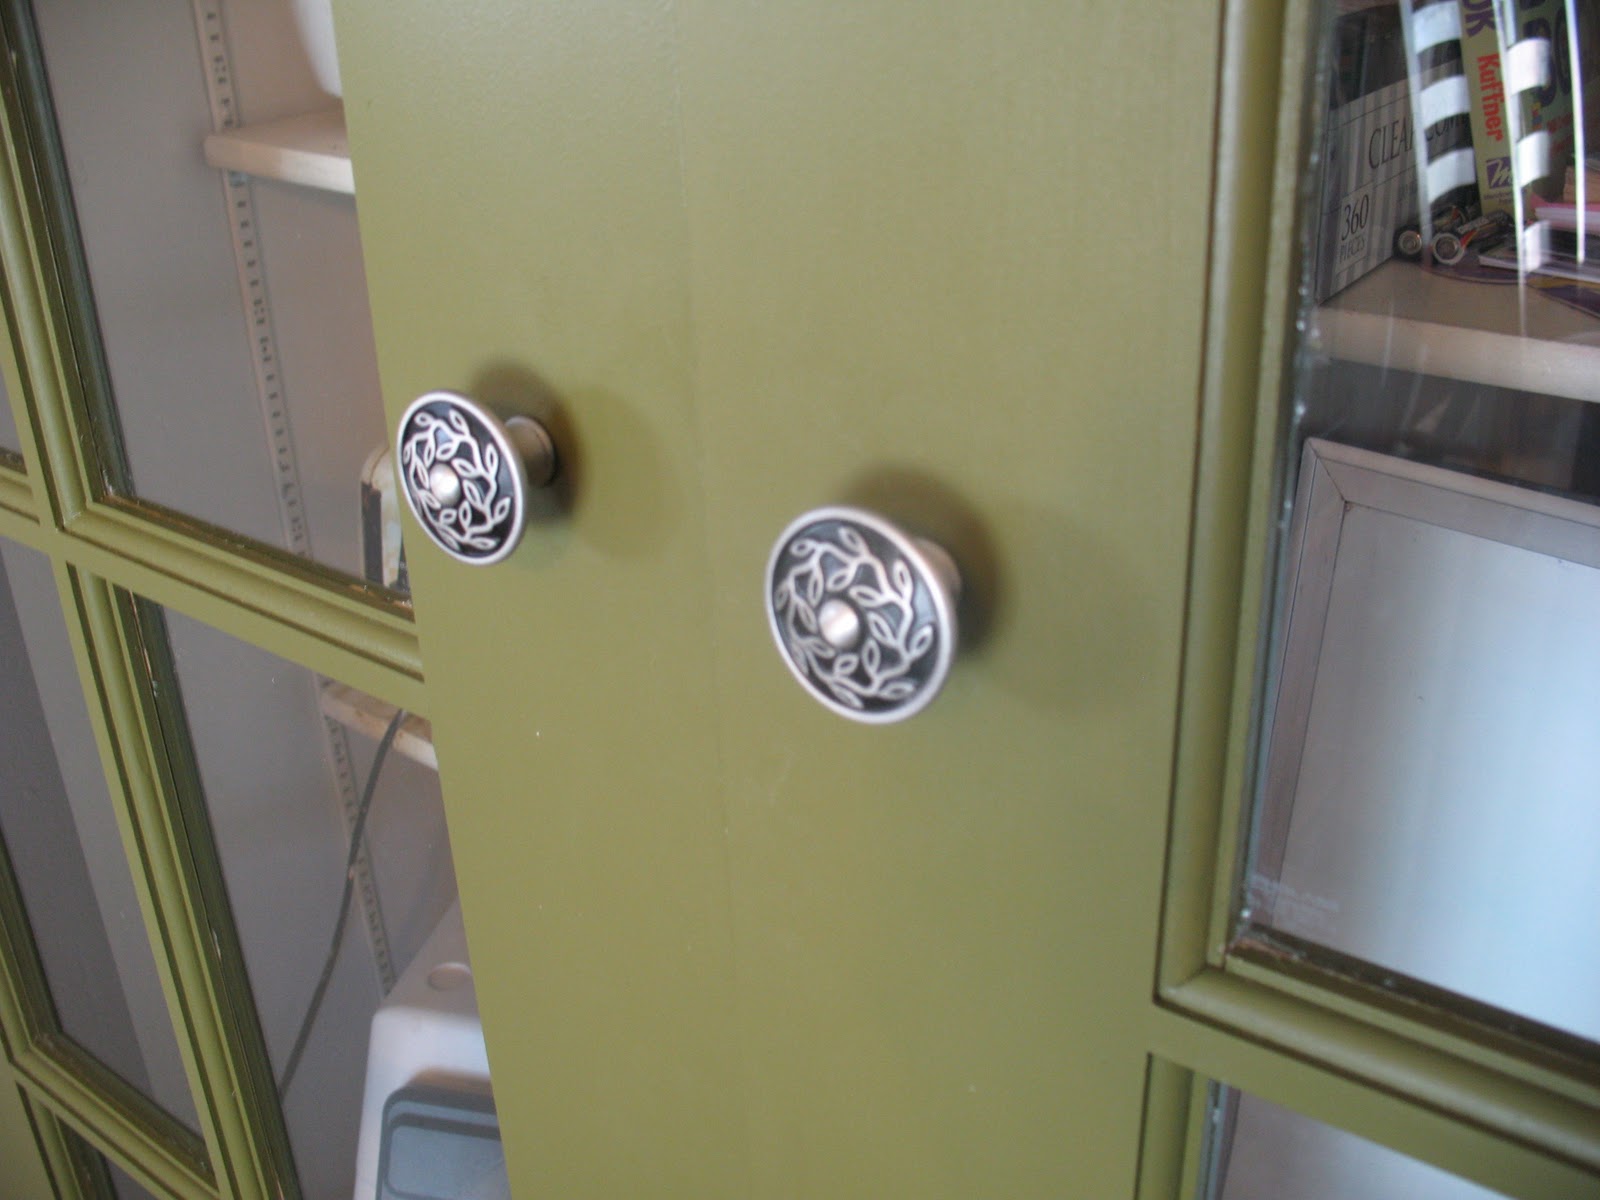
(The knobs are from Hobby Lobby.)

I 'SQUEEED' like a teenage girl meeting some pop idol (don't ask me who, I can't keep up) when the piece came together.  I even clapped and jumped up and down, much to the amusment of my husband.

Here's the transformation:

BEFORE
(you'll have to use your imagination - I forgot to snap a true before picture the drawers haven't been sanded at all)

AFTER


What I Learned
  • I love painting furniture
  • I am still scared of distressing, dry brushing and other such finishes - what if it doesn't turn out and I have to start over??  I love how it looks so I'll continue to face that fear.
  • Once you have some of the basic tools & supplies (ie: sander, sanding blocks, protective finish) refinishing furniture is really cheap! 
Next up on this project - repurposing the mirror from my old bathroom and finding a cute little stool. 

Wednesday, March 23, 2011

New Floor

Long ago we decided to replace several different types of flooring in our home with tile.  We were just dragging our heals on the project because of both time and money.  When we were kinda forced into a bathroom remodel it seemed like a great time to tackle the entire upstairs. 
We are nothing if not ambitious.
And maybe a little crazy.


We selected a great tile from Home Depot and with the help of my Father-In-Law we started tiling our entryway, hall way, bathroom, kitchen and dining room.  Can I just tell you how much fun it is to try to lay square tiles in a home that doesn't have a single square wall.  I was cross eyed by the time we were finished figuring out where to start.

I am so proud to say that I tiled the entire area myself (minus the handful my FIL did to teach me).  A little over 400 square feet.  Go Me!  James kept me supplied with tiles and cut the tiles when needed.  That was pretty much a full time job itself so I was very grateful for his help.


I love this floor.  The variations in each tile were a little unexpected and I was not happy when I first saw the light tiles.  The sample at the store had only dark tiles so when I opened up all my boxes and discovered the dark tiles weren't as common as the light tiles I almost returned them.  BUT... we were on a time table and I didn't have time to figure something else out.
I am so glad I kept these tiles!!  Gotta love it when things work out despite your fears. 

I'll admit that there is one tile, ONE, that bugs me.  I tried really hard to be sure that the tiles blended into the surrounding tiles but this one didn't.  grrrrr.  It's in the picture below - can you spot it or is it just me?


Ahh...
So much better than the four different flooring types we replaced.  I shared a picture of three of those in this post

Once again I learned something new about myself by redoing my floors.  I though I hated mopping.  I don't!  I just hated my floors, they never felt or looked clean no matter how much I scrubbed.  I mop all the time now - gotta keep my lovely tiles lovely!

The floors look so good with my new pantry doors.
More on those later...  LOVE THEM!

Oh yes, and because we can never finish a project...
The step is about a quarter inch bigger than the end piece tiles.  We either need to shave the step back a little bit or have a HUGE grout line after the edge piece.  We'll figure it out sooner or later... and maybe even get the new molding on too.

Friday, March 18, 2011

Progress On My Vanity

Each month I have a few (sometimes even just one) goal to get done on my home.  I feel like they are pretty realistic goals - but then again, I'm finishing up January's goal this weekend so I guess they aren't as wise of goals as I'd hoped.  Anyone else do that?  Anyone...  please... nope, just me - darn!

For the last year and a half I've been searching Craigslist & KSL for a used desk to turn into a makeup vanity for myself.  I had some pretty specific requirements for the desk as well as a desire to have something really girlie with some great curves.  I see all these deals that people get on Craigslist around blogland and I feel completely jealous!  There was nothing for less than $200 and even the expensive pieces still would've needed to be refinished.  GAH!

I mentioned to my mom that I wanted to find a wood desk with little drawers on each side.  At this point I wasn't even worried about the curves.  Do you know what she said?  SHE HAD A DESK... and... SHE WAS WILLING TO PART WITH IT! 

(Mid-sanding)

I had completely forgotten about the little desk in her office (she has three desks in her office so it isn't hard to forget about one). I was so excited - not only did she have the perfect little desk but it would be something from my mom. Perfect! It's not curvy, and do you know what, I think I like it even more than my original vision.

I used about 100 sheets of sandpaper.  Okay, not really, but it sure felt like it.  I eventually borrowed a friends belt sander to get all the varnish and stain off the desk - it worked lickety-split!  I added a little doo-dad to the front panel and was ready to paint.

More on the painting later - I'm so excited to see this project completed. :D

Sunday, March 6, 2011

"New" Kitchen

I have been dreaming of a new kitchen ever since I moved into my home in May of 2005.  It was supposed to be done by the end of that year.  It was top on a long list of "Things To Do To The Home."
It was going to be glorious. 
Then... life happened and the kitchen just wasn't that important any longer. 

As time went by my dream kitchen morphed a little here and there but mostly remained the same.  Unfortunately, it kept the same expensive price tag. 

Last year my husband and I sat down with the finances to see if we would be able to redo the kitchen in the next couple of years (not a fun task when you're self employed in the construction field during a poor economy).  We figured the dream kitchen will have to wait for our dream house.  My husband apologized profusely - but there really was no need.  My mind was already spinning with new ideas, cheaper ideas, ideas I could do NOW instead of waiting for the funds that never seemed to magically appear in our 'kitchen fund.'

Step 1:  Pretty Up the Pantries
 
We are lucky to have 3 large pantries in our kitchen.  Extremely lucky.  The more I thought about it the more I was glad to keep them.  I just don't like the wall of closets in my kitchen.  It felt odd.  It will be fixed.

Step 2:  Flooring
I hate my floors.  Yup, plural, floorS.  From the picture above you can see 3 different types of flooring.  There's another type in the Living Room around the corner and yet another type in directly behind in the Family Room.  Oh yes, and another one in the bathroom (before re-doing the bathroom).

There are many, many, many (sigh) more steps in my grand plan to overhaul my kitchen but these are the first two and probably will make the biggest impact.

Saturday, February 26, 2011

Favorite Color

This makes me happy!


My favorite color by far is teal.  A deep saturated teal.  The color you find on a peacock.
I'm so excited to use it in a project I'm working on for my bedroom.

Just a little lot more sanding a light coat of paint and I'll be done.


Friday, February 25, 2011

Bathroom Redo

I have learned something very important about myself.

I thought I hated cleaning bathrooms.  I was SO wrong.
I just hated my old bathroom.
My new bathroom however, it gets cleaned every day!
It's one of my favorite rooms now and it's not even completely done yet.

Want to see it?
Sure you do!
See that tub... I LOVE THAT TUB!  I keep it sparkling and clean.  The best part about it is it is YELLOW!  Who else has a yellow tub?  Well, a yellow tub on purpose.  I'm sure there are lots of dingy yellow tubs out there - but this one is purty!  I picked this up for $150 on Craigslist.  I played with the idea of refinishing the interior and exterior myself but decided to have a local company that specialized in cast iron tubs do it - so worth it!
(don't mind the plunger hiding in the background - he'll be hidden by the shower curtain eventually)


The room is bright and happy.  The yellow turned out to be a little off from what I wanted so I've got paint chips sitting on the ledge that I'm debating between.  The yellow walls will still be yellow but a little toned down.

The walls will be closer to the top yellow on the paint card, I think, maybe the 2nd one down. Either way the new paint will match the tub much better.  The top one doesn't look like that much of a difference in the picture but it is in real life, I swear.  
My Sexy Beast of a husband can't see the difference but he lost all say-so on shades of colors when he said he can't tell the difference between when I wear makeup or not.


I love my faucet, the bowl - not so much.  I'll be hunting for a different one down the road.  Something more rounded on the bottom, not so modern.  The counter top is a favorite of mine - the color is okay, the instillation is okay for DIY - what makes it a favorite is that it was less than $40!  SCORE!
Wave HI to me :D  Do you know how hard it is to take pictures in a bathroom?

Another favorite in the room is the beadboard ceiling.  So much fun (to look at, not to install mind you).
I've got some fun plans for decor for the shelf that lines the whole room. 
Can't. Wait.

Did I mention that we did all the work on this ourselves?  My husband did most of it - he sure loves me.  He moved walls, he replaced the subfloor, he cursed at beadboard panels.  All for me and my crazy ideas.

Why did we re-do our bathroom? 
Two reasons actually.
1. It needed it
2. This cute little boy flooded our house and the bathroom was beyond saving. 


The floor started peeling up and the cabinet was disintegrating before our eyes.  I was so mad and grateful all at the same time.  We have been wanting to redo our bathroom for the last 5 years.  We just needed a little push.

I even scrapbooked it so Xander would never live it down. 
(if you click on the picture it will make it bigger so you can read the text)

Thursday, February 24, 2011

2011 Projects

Every year I make a list of projects I want to get done around the house.
Every year I only complete a couple of them.

This year will be a little different.  We had a minor child induced flood last year that helped us in starting A LOT of projects I've been wanting to do for so long.  Now they are all underway in varying degrees of completed-ness.

I've already had a busy year getting my main bathroom done, redoing all my pantry doors and finishing up a lot of the little things that get put off.  I'm excited for the rest of the year.  Here's what I'm going to get done:

1. My lower cabinets. 
Installing beadboard on the backside, stripping & painting them.

2.  New Countertop in the Kitchen

3.  Upper Cabinets
We're taking off doors on some to provide open shelving and painting the rest.

4. My stairs need a overhaul! 
They have a worn tan(ish) carpet that just looks awful surrounded by all my pretty new tile.

5. Master Bath Redo
We've long passed the point where it changed from a "I'd like to" to "Oh My - this just HAS to get done."

6. Front Door Facelift 
New paint, hardware & screen door.

7.  Finishing up my almost 3 year old daughter's room
Sad to say, it's not done.  It's cute but not nearly finished.


There is so much more I want to get done but knowing me and knowing my time and money I'm pretty sure it won't.  There are some little projects I'll get done along the way but I'm going to really focus on just these main areas this year.

Thursday, June 3, 2010

Done, AT LAST!

Isn't it just fun when something is a whole lot more difficult than it should be!?!

That seemed to be the story of my frame.

I got this frame from my grandmother a little while ago and knew exactly what I was going to do with it.

I took off the back board and started cleaning the frame so I could paint.  Turns out the brass around the edge was a sticker!  I had to peel it all off and then scrub off the residue... um - just a little time consuming.  A five minute project quickly turned into a 90 minute project.

I spray painted the frame with black in a matte finish - it looked lovely.

The backboard was the next project.  The dead plant pieces had to go!
This frame has had several lives apparently.  I was surprised to find a painting under the black felt fabric.
Cute?  Maybe a little.  Just not on my wall :)

I covered it up with textured wallpaper from Lowes.  Really pretty stuff that could be painted but I wanted it left white (for now). 

Now came the hard part.  I envisioned a layered look on my wall.  Frame, silver platter & something pretty on the platter.  The silver platter is special to me and my husband.  It held our wedding cake and everytime I look at it I remember that wonderful day.  Hence, wanting it on my wall. 

Unfortunately, the platter didn't really want to be on the wall.  Lets just say I won after a few extra holes in the wall.

YAY!

Ready to review...
BEFORE


AFTER


Tuesday, May 25, 2010

I Heart New (to me) Frames!

Bad Blogger!
Feel free to slap my hand next time you see me.
I have neglected in posting my projects, which have been many. 

I'm sure all my readers...
(HA!  You probably didn't catch the joke there - I think I have one!  Hi Grandma)
...anyways... I'm sure all my readers (smirk) have been missing my projects. I'm going to try to catch up writing about most of my projects over the last couple of months, mostly because I view this blog as a journal for myself.   I've also had the bad habit of not taking pictures of finished projects and then giving them away as gifts... oops.

Last week I got a treasure trove of  frames sent home by my Grandma.


I have firm plans for two of the six frames.  Possible plans for a third - we'll see.  One is going to be a Christmas decoration (is it bad I'm thinking about Christmas deco in May??).  Another is going to be used to fill a very blank wall.  YAY!


This thing is HUGE!  It holds a picture that is 24" x 48".  My hubsand says it looks like it once held a picture of 'The Last Supper' but the dead plants glued to the board are a giveaway that it didn't.  Yuck.

I scrubbed, peeled fake brass, and painted the frame last night.  Tonight I'll be putting the dead plant remnants to rest.

I can't wait to get this one done.

Saturday, February 20, 2010

A New Love

I went to my second Card Party this week. It is so much fun and while I don't do a lot of crafts with paper but I can definitely see the appeal. The best part about these parties has been getting to know some awesome ladies in my neighborhood.
It only took me 5 years to start remember names... I'm pathetic.

Since I didn't ever give away the first set of cards I made I was excited to see that we were making journals instead. I am a freak over journals. Not writing in them mind you. I think each of my journal entries start with "It's been a long time, I'm going to do better." I absolutely LOVE owning them! I have to be careful when I go to Barnes & Noble. Every single journal calls to me and they have some very nice (and pricey) ones.

Back on track… I went to a card party and tried a new thing.
Embossing.
Neatest thing since sliced bread.
I. Love. It.

Now I just need to find some embossing stuff for cheap.

I made this simple and lovely journal:

mmmm... Glittery goodness


Last time I made these cards.
Yup, that’s a valentines card. I put it somewhere safe after I made it and forgot all about it. I’m prepared for next year now.

Oh, I made a new bookmark too.

Tuesday, February 9, 2010

Valentine's Card

My 3 1/2 year old has his first Valentine's Day Card Exchange tomorrow.  He's getting so big! 
I came across this idea from 24-7-365 and knew it would be perfect for Xander. 

I convinced my kid to hold is hand out just so... 
Added some words to the photo... 

I had them printed and bought cute Valentine's pencils to go along with them.
My husband was nice enough to inform me that only the mean moms send their kids with pencils for V-day gifts so...

I got suckers! 
See... I'm a nice Mom.  I swear.

Friday, January 22, 2010

What A Sexy Beast

Want to see what I find incredibly sexy?

This man right here:

Forgive me for the poor picture quality.  I took this picture on the sly, through a window that I don't remember when I cleaned last, during a small snow storm from quite a distance away.  Had to be sneaky!  Knowing all that it looks pretty good huh?!?

Anyways... This is a picture of my husband crafting in his own way.  He is so creative.  I'm pretty sure this little something is for me because he got that "I'm not doing anything" smile that he gets when he's trying to be sneaky.  I could make a guess at what it is but I don't want to jinx it so I'll just wait to be surprised.  Now you can wait with me :)

Monday, January 18, 2010

The Cutest Ribbon Storage EVER!

I am WAS constantly loosing track of my ribbon.  Seriously, it would disappear never to be seen again.  I even began to suspect some creative little bird found my random pieces to decorate her nest.  Or maybe the racoon in the field next door was trying to steal more than just dog food.  To this day I cannot find the ribbons I've used in past projects.

I saw this idea from the wonderful blog The Idea Room and had to make one for myself.  It has been probably one of the fastest and easiest ways to organize my crafting supplies so far.  I went to DI in search of a container and came across the cutest glass box/jar thingy with a glass bow on top.

Here's my ribbon storage... ahhhh...


Check out this cute little bow


Now I catch myself checking out the ribbon at stores just to see if there's anything that catches my eye.  I never used to buy ribbon without it being needed for a project in the works because I knew I'd loose it (or those pesky critters would steal it).

Now I have ribbon to do fun things with at a moments notice!  If you know me, then you know I spend more time reading than I do thinking about fun things to do around my house - which speaks volumes for the amount I read.  In a bookclub I'm in we do bookmark exchanges and I always try to make one.  Here's one I just made for a friend of mine using ribbon that would've been lost forever without my new ribbon jar.


Friday, January 15, 2010

Magnetic-Chalkboard Frame

One of my goals for 2010 is better menu planning.  I'm horrible at it and we often end up scrambling at dinner time to figure out what to eat.

One of my biggest problems is that after the initial menu planning before going grocery shopping I don't think about dinner.  Here's an example of a common conversation between my hubby and me:

Hubby: "What's for dinner hun?"
Me: "uh..."
I check my menu and see that I should've pulled stuff out of the freezer hours ago. Now we're left with either peanut butter and jelly sandwiches or hot dogs... but oh wait... no hot dog buns....
Me: "uh..."

So, my first step is to force myself to think about dinner before dinnertime.  I have this little wall between my family room and kitchen that I pass a bajillion times each day.  It's plain, boring and in need of some attention.  PERFECT!

I found a frame, hunted out the perfect spray paint and had my husband cut me a piece of steel (because he has stacks of it laying around in his garage and if I'm going to have to deal with it being everywhere then I should get a piece of it - right?).  I pulled out my chalkboard spraypaint and came up with this beauty.


I know Mustard Yellow isn't for everyone but I LOVES IT!  See,


Besides the location it's really not much more useful than the paper menu I keep by the stove.  This is where I got excited about the idea... and the reason I had my husband cut the steel.

I typed out all of my family's standard meals, printed them up & attached magnets to the back. 


Now I can move meals around when I need to without re-writting the whole thing.  That shouldn't be a problem anymore though - the menu is so cute I can't stop going over to check it out.  No more "uh..." moments for me!

If you are into Mustard Yellow this is actually called Cat Yellow - as in Caterpillar Machinery.  After searching through several stores for the right color of spray paint with no luck I came home to find out my husband had 8 cans of it in his garage so I commandeered one (after asking of course).

(For the font on the magnets I used 'Hand of Sean' from dafont.)